Office of the Registrar How-To Guides
Welcome to the Office of the Registrar's How-To guide. Here, you'll find step-by-step instructions and resources to help navigate your academic needs. If you have any questions or can't find the information you're looking for, please check our Frequently Asked Questions (FAQ) page for additional insights. Should you need further assistance, don't hesitate to contact the Office of the Registrar at (601) 318-6195 or regoff@wmcarey.edu.
Once you have registered, you may change your schedule online (as normally done with drop add forms in the Registrar's Office) for the two-week pre-registration period without a fee. After that two-week period, a fee of $75.00 per drop will be automatically charged to your account, if you change your schedule, and it results in a decrease in your number of hours. No charges will apply if hours are added or stay the same. Plan ahead before you register, as the fee will be added automatically each time a drop is performed that results in a decrease in your number of hours.
- Before beginning the registration process, decide what courses you need to take based upon your program of study. Course schedules are available here: Catalogs and Schedules
Consult with your adviser as needed or as required by your department. - Login to the Indigo Student Portal: Indigo Portal Login
- Click CHANGE TERM on the menu, and select the term for which you will register.
- Click Registration on the menu. The Pre-Registration page opens allowing you to verify/update required demographic information and accept financial responsibility for your registered courses. The Registration page opens.
- Click Show Filter, if available. Do not click Hide Filter as this will prevent you from completing steps 5 - 8.
- Type the department of the course for which you would like to search in the Department input field. Example: NUR, BUS, EDU, REL, etc.
- Type the course number of the course for which you would like to search in the Course ID input field. Example: 2100, 1300, 4100, 4440, etc.
- Select the radio button next to the campus at which you are registering for this certain course.
- Click Apply Filter.
- You will now see a list of all courses matching your selected criteria.
- Check the credit box for the courses you wish to take.
- Repeat steps 5 through 10 to register for your remaining courses.
- Click Process Registration.
- Once you have officially registered for classes you will see the Registration Checkout page with your schedule.
- You can then print your schedule by clicking the printer icon.
- You must make payment arrangements with the Business Office. You can also pay your bill online by clicking on My Ledger from the Indigo Portal Home page.
- If you are registering for more than one term, start again at #3 above, select the next term for which you need to register, and continue with the remaining steps. (Only in Spring for Summer/Fall registration.
If you need to speak with your adviser, you may find his or her contact information by following these steps:
- Login to the Indigo Student Portal: Indigo Portal Login
- Click on My Advisor under Student Portal along the left-hand side of the page
The myStatus page will assist in communicating with Carey students about the status of their admissions and registration information through the Indigo Portal. This page contains important information pertaining to a student's individual standing with various departments across campus. It will allow a student to be more involved and responsible for the admission application, class registration, and advisement processes. Below is a breakdown of the information available to students and faculty members on the My Status page. This information is available to students through the Indigo Student Portal and faculty through the Indigo Faculty Portal.
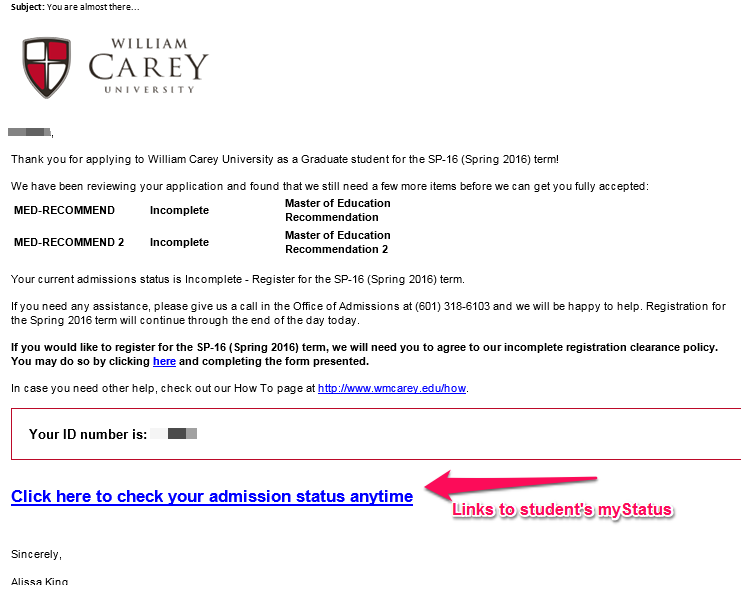
After submitting the Admissions application, students will receive an email providing information about the status of their admission application and a link to the myStatus page in the Indigo Student Portal.
Within this email, non-current students will have the opportunity to click a link in order to generate a Clearance Form for Pre-Registration.
Students can continue to check the status of their application at any time using the link within the email. This link will provide up-to-date admission information until the application is complete.
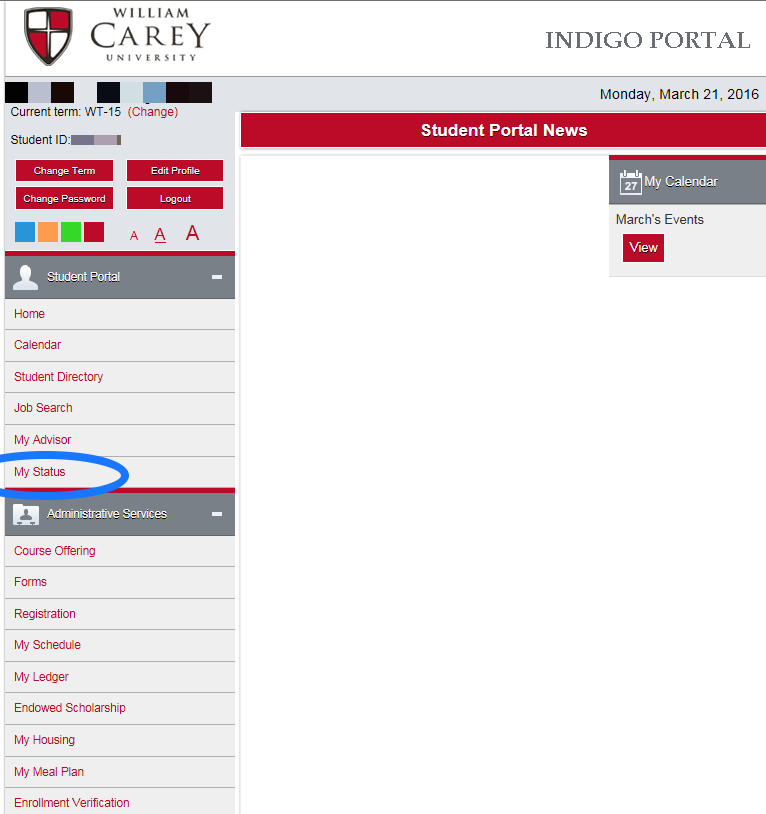
Current students may check their eligibility to register from the myStatus option in the Indigo Portal. Make sure you select the current registration term.
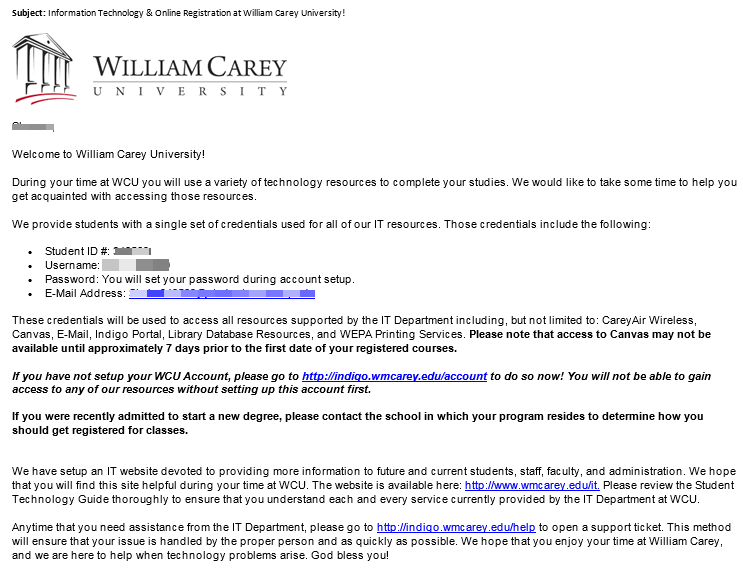
Indigo PortalAfter a non-current student completes a Clearance Form or is moved to full Acceptance, the student will receive an email describing the process to set up a WCU account. This will allow access to the Indigo Student Portal, Canvas, and Student Email.
myStatus is located in the Indigo Portal and provides current information to allow students to manage their admissions and registration information at Carey.
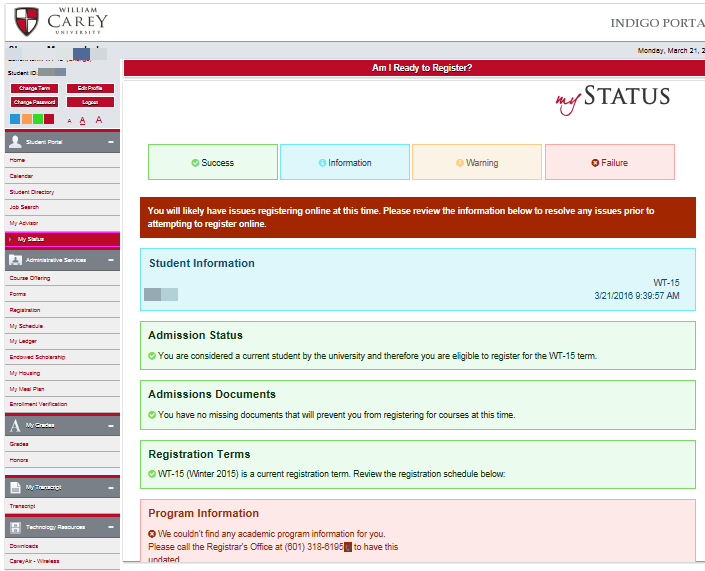
Blue boxes represent general information about the student's profile that does not require any action on the student's behalf.
Green boxes represent required data fields and procedures that have been properly completed in order to allow registration.
Orange boxes represent partially incomplete information. Information in an orange box may allow a student to register for their first term but may cause registration issues in future terms.
Red boxes represent a failure to properly supply data or complete procedures essential to registration. All information in red boxes must be addressed before a student may register for classes.
The boxes listed under a particular student relate specifically to his or her current state in the registration process. Not every student will be in the same step of the registration procedure which means that you may or may not see all of these boxes under your profile.
- Admissions Status: This box contains the student's current status in the Office of Admissions. A student may move through several different statuses in his or her admissions process, and not every status will allow registration. Information on the student's most recent application and how to contact the Office of Admissions has been supplied for the student.
- Admissions Documents: This box lists important documents that the student will need to submit to the Office of Admissions. Documents that are listed in bold are missing. Contact information for the Office of Admissions has been supplied for the students.
- Admissions Status Notification: This box displays the student's current Admissions Status. This box will also display whether or not clearance email has been sent to a non-current student. Faculty and Staff will have an option to re-generate the email.
- Admissions Clearance: This box shows whether or not a non-current student has completed a Clearance Form to allow pre-registration.
- Registration Terms: This box will display whether or not the term for which a student applied is currently open for registration. It includes dates for Pre-Registration, General Registration, and Late Registration. Also included is a link to view any special registration events that have been scheduled.
- Program Information: This box will display a student's declared major(s) and minor(s). It will also display whether or not a program has been chosen as a student's primary course of study. Each student must supply a major. Students who are unsure of their programs may select Undecided as a major. Contact information to the Registrar's Office has been supplied if any items need to be addressed.
- Religion Information: This box displays a student's chosen religion. Each student must declare a religion of preference. If the student chooses Southern Baptist, he or she must also supply the name of the church attended. Contact information to the Registrar's Office has been supplied if any items need to be addressed.
- Missing Transfer Transcript: This box lists all currently outstanding transcripts that the Office of Admissions needs in order to determine a transfer student's admission or rejection. The student is prompted to contact their former institutions in order to have the transcripts sent to WCU.
- Transfer Transcript Evaluation: This box lists all transcripts that the student has properly submitted that have not been evaluated by the Registrar's Office.
- Advisor Information: This box displays whether or not a student has been assigned an advisor. Each student must be assigned an advisor before being allowed to register. If the student has been accepted, there will be a prompt for the student to contact his or her School in order to have an advisor assigned. If the student has not been accepted, the student will be prompted to complete the Admissions process.
- Advisor Clearance: This box displays whether or not a student has received clearance to register from his or her advisor. If an advisor has been assigned, the student will be prompted to contact his or her advisor by name. If no advisor has been assigned, the student will be prompted to contact his or her School in order to have an advisor assigned.
- Registration Holds: This box displays any holds that may be on the student's account. The student may have multiple holds from multiple Offices on campus. Not all holds stop registration, though many will need to be removed before registration can be completed. Contact information for each department with a hold on the student's account is listed.
- Information Technology Account: This box will note whether or not a student has successfully activated an Indigo Portal account. Additional information is provided to prompt the student to setup the account if he or she has been accepted or explain why the account cannot currently be setup.
- Information Technology Welcome Letter: This box will note whether or not a student has been sent the IT Welcome Letter. If the letter has been sent, the email address to which it was sent is listed. If the letter has not been sent, the student is prompted to contact the Office of Admissions in order to check his or her admissions status.
When you view your schedule, you will see an abbreviation for the various buildings. Use the tables below to determine which building corresponds to your schedule.
HATTIESBURG BUILDINGS
View a map of the Hattiesburg campus!
| Abbreviation | Building Name |
|---|---|
| AAB | Asbury Building |
| BA | Biology Lab Annex |
| BB | Business Building |
| BCPL | Bass Chapel |
| BWF | Ben Waddle Sports Facility |
| CBH | Carey Band Hall |
| CHS | College of Health Sciences |
| CLI | Clinton Gymnasium |
| CSA | Cherry Street Art Studio |
| FAI | Fairchild Hall |
| FAN | Fail-Asbury Hall |
| FOR | Forrest General Hospital |
| GRE | Green Science Hall |
| LAW | Lawrence Hall |
| LRS | Lorena Roseberry-Smith Hall |
| MPB | Multipurpose Building |
| OMS | Osteopathic Medical School |
| PINE | Pine Grove Mental Health Center |
| PSB | Painting Studio Building |
| TBA | To Be Announced |
| TBB | Thomas Building |
| TFA | Thomas Fine Arts Hall |
| TFAAUD | Thomas Fine Arts Auditorium |
| TFASRH | Thomas Fine Arts Small Recital Hall |
| TFACL | Thomas Fine Arts Conference Room |
| TFACLAB | Thomas Fine Arts Computer Lab |
| TFAPLAB | Thomas Fine Arts Piano Lab |
| TPK | Tatum Park |
| SEL | Select (For Nursing Classes) |
| STH | Southern Lanes Bowling Alley |
| WBF | Wheeler Baseball Field |
TRADITION BUILDINGS
| Abbreviation | Building Name |
|---|---|
| A | Administrative Building A |
| B | Academic Building B |
| SCIAN | Scianna Hall |
Please note that fees may be assigned to any student who drops hours from an official schedule. If you wish to add and drop a class, complete both actions before processing your registration. This may prevent you from being improperly charged fees. Additionally, dropping below full-time hours for your degree may affect your enrollment and financial aid status.
- Login to the Indigo Student Portal Indigo Portal Login
- Click CHANGE TERM on the menu, and select the term for which you are registered.
- Click Registration on the menu.
- Under the filter area, you will see This is your current schedule for the XX-XX term.
- Click the Drop option by the class that you wish to drop.
- Click Process Registration.
- Click OK.
- Click My Schedule under Administrative Services in order to make sure that your schedule is up to date.
Please note that you will receive emails in your student email account that will update you on the status of your request. Until you have received official notification from the Registrar's Office, do not consider your request finalized.
- Login to the Indigo Student Portal Indigo Portal Login
- On the left-hand side, under Administrative Services, click on Forms.
- Click on Change Major/Minor.
- Complete the form with required information.
- Click Submit.
- Login to the Indigo Student Portal Indigo Portal Login
- On the left-hand side, under Administrative Services, click on Forms.
- Click on Change Campus Location.
- Complete the form with required information.
- Click Submit.
- Login to the Indigo Student Portal Indigo Portal Login
- Click on Edit Profile at the top of the left-hand side of the page.
- Click on Edit beside the address you wish to change.
- Change information as needed.
- Click Update.
- Login to the Indigo Student Portal Indigo Portal Login
- Click Forms under Administrative Services on the left hand side of the page.
- Click Name Change Request.
- Fill out the New Information block with the information you wish to change.
- Upload a scanned copy of pertinent documents required in order to verify name change.
- Select the option under Confirmations that applies to you.
- Type your full name into the blank to electronically sign the document
- Click Submit Name Change.
Please note that you will receive status updates via student email. You are not fully withdrawn from the term until you have received final confirmation from the Registrar's Office.
- Login to the Indigo Student Portal Indigo Portal Login
- On the left-hand side, under Administrative Services, click on Forms.
- Click on Withdraw from Carey.
- Complete the withdrawal request form. Be sure to review each statement carefully before agreeing to each.
- Click Submit Withdrawal Request.

Hattiesburg
WCU Box #4 | 710 William Carey Parkway | Hattiesburg, MS 39401
regoff@wmcarey.edu | (601) 318 - 6195
Tradition
19640 Highway 67 | Biloxi, MS 39532
registrar-tradition@wmcarey.edu | (228) 702 - 1814